Preparing for Concrete Slab Installation
Assessing the Site – How to choose the right location and evaluate soil conditions
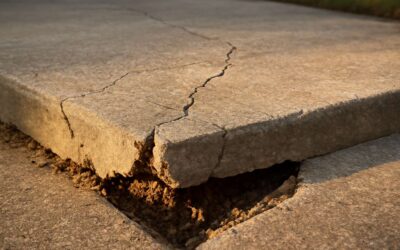
Understanding the importance of site assessment can make or break your concrete slab project. An uneven or unstable foundation leads to cracks and costly repairs down the line. When assessing the site, start by evaluating the soil conditions. Good soil should be well-draining, with minimal organic matter and stable compaction. Poor soil can cause shifting or sinking of the slab, making proper preparation essential.
Choosing the right location is equally critical. Look for an area that’s level, away from trees or other roots that could disturb the foundation. It’s worth noting that a well-chosen site simplifies the entire process of concrete slab how to.
Consider these key factors:
- Soil stability and drainage
- Sun exposure and shading
- Accessibility for equipment and materials
A thorough site assessment ensures the concrete slab will stand the test of time, saving you headaches later.
Gathering Necessary Tools and Materials – List of essential tools and materials for pouring a concrete slab
Preparing for a concrete slab installation requires more than just mixing cement and pouring. It’s about gathering the right tools and materials that will turn your project from a gamble into a triumph. The difference between a durable, long-lasting slab and one riddled with cracks lies in meticulous preparation.
Essential tools include a robust concrete mixer, a bull float for finishing, a screed board to level the surface, and a trowel for final smoothing. Don’t overlook the importance of safety gear—gloves, boots, and eye protection are non-negotiable.
For materials, you’ll need high-quality concrete mix tailored to your project’s size and load requirements. Reinforcing materials such as rebar or wire mesh are vital for structural integrity. Additionally, form boards shape the edges and maintain the needed dimensions.
A well-stocked toolkit and precise materials set the stage for a successful concrete slab how to. With everything in place, you’re ready to transform your vision into a concrete reality that will stand the test of time!
Obtaining Permits and Understanding Regulations – Guidelines for securing permits and adhering to local building codes
Before you even lift a trowel, understanding the legal landscape surrounding your concrete slab how to project is crucial. Local building regulations and zoning laws often dictate specific requirements, and neglecting them can lead to costly delays or even demolition. Securing the necessary permits is not merely a bureaucratic step; it’s a safeguard that ensures your construction meets safety standards and adheres to regional codes.
In many areas, obtaining permits involves submitting detailed plans and possibly undergoing inspections. It’s wise to contact your local planning department early in the process. They can provide guidance on the documentation needed and any restrictions that might influence your project. Remember, each jurisdiction has its own set of rules—what’s permissible in one locale could be restricted elsewhere. Familiarising yourself with these regulations forms the foundation for a smooth concrete slab how to journey, helping you avoid legal complications and ensuring your project stands the test of time.
Design and Planning the Concrete Slab
Determining the Size and Thickness – Factors influencing slab dimensions and thickness
Designing the perfect concrete slab begins with understanding that size and thickness are not merely arbitrary figures, but carefully calculated elements influenced by a constellation of factors. According to industry sages, the strength and longevity of a concrete slab how to is directly proportional to meticulous planning.
For instance, the intended use—be it a modest garden path or a substantial garage floor—dictates the dimensions of your slab. Moreover, soil conditions, weight loads, and environmental exposure play pivotal roles in determining the appropriate thickness. Typically, a residential concrete slab how to might range from 100mm to 200mm thick, but these figures fluctuate based on specific needs.
It’s essential to consider the load-bearing capacity required—heavier vehicles demand a sturdier, thicker slab—while also accounting for future expansion or modifications. A well-thought-out plan ensures that your concrete slab how to transforms from a superficial layer into a resilient foundation that stands the test of time.
Creating a Job Site Plan – Steps to design a detailed plan including layout and measurements
Designing and planning a concrete slab is akin to orchestrating a symphony—every element must harmonise to create a durable, functional masterpiece. When creating a detailed job site plan, clarity and precision are paramount. Visualise the layout as a blueprint of your future foundation, where measurements become the notes that guide your construction melody.
Start by sketching out the intended footprint of your concrete slab, ensuring that every dimension aligns with your specific needs. Incorporate key measurements for length, width, and thickness, considering factors such as load requirements and environmental exposure. For a seamless process, follow these steps:
- Mark the perimeter with stakes and string lines to establish the boundaries clearly.
- Use a tape measure and chalk line to delineate precise measurements for corners and edges.
- Plan for expansion joints or control joints, which will help prevent cracking as the slab settles.
By creating a thorough and thoughtfully crafted job site plan, you set a solid foundation for your project—literally and figuratively. Remember, a well-designed plan is the first step in mastering the art of concrete slab how to, transforming raw materials into a resilient, enduring surface that stands the test of time and toil alike.
Choosing the Right Reinforcement – Types of reinforcement such as rebar and wire mesh
When embarking on the journey of constructing a resilient concrete slab, selecting the appropriate reinforcement is the heartbeat of durability. Reinforcement acts as the unseen backbone, transforming a simple poured surface into a fortress capable of withstanding both time and tension. The two primary champions in this arena are rebar and wire mesh, each with their own symphony of strength and flexibility.
Rebar, with its rugged steel rods, offers unparalleled tensile strength, making it ideal for slabs subjected to heavy loads or environmental stressors. Wire mesh, in contrast, provides a uniform grid that helps distribute stresses evenly across the surface, reducing the risk of cracks and fractures. Combining these materials can often yield a superior result, especially when the concrete slab how to calls for a harmonious blend of resilience and adaptability.
Choosing the right reinforcement involves considering factors such as load-bearing requirements, soil conditions, and the anticipated lifespan of the slab. For instance, a commercial concrete slab may demand thicker rebar, while a residential patio can often suffice with wire mesh. Remember, the key to mastery in concrete slab how to is not just in pouring but in forging a foundation that endures—reinforcement is the silent architect of that endurance.
Site Preparation
Clearing and Excavating the Area – Best practices for clearing vegetation and excavating soil
Before the first scoop of concrete is poured, a site’s wilderness must be tamed. Clearing vegetation and excavating soil isn’t glamorous, but it’s the backbone of a sturdy concrete slab how to. Think of it as giving your future pavement a clean slate—minus the graffiti and weeds. Skimp here, and your slab might develop cracks as rebellious roots push through years later.
Best practices include removing all organic debris—grass, shrubs, and that mysterious pile of gravel you forgot about—then excavating to the recommended depth. This ensures your concrete isn’t fighting against uneven ground or unexpected soft spots. To keep things tidy and precise, consider creating a detailed plan, marking out the boundaries, and measuring every inch. Using a laser level or string line can help keep your excavations straight and true, preventing the dreaded “wobbly” concrete slab how to disaster. After all, a level site is the foundation of a masterpiece—just ask any professional who’s ever tried to fix a wonky driveway.
Leveling and Compacting the Ground – Techniques for ensuring a stable, even base
In the grand theatre of construction, the foundation often remains unsung, yet it is the silent architect of durability and longevity. When embarking on a concrete slab how to journey, one of the most critical acts is the art of leveling and compacting the ground. This stage transforms a chaotic patch of earth into a steadfast canvas, ready to bear the weight of future prosperity. A well-prepared base resists shifting, cracking, and the silent rebellion of unseen forces beneath the surface.
Achieving this stability requires meticulous technique and an eye for detail. First, the ground must be thoroughly levelled—no undulations, no soft spots, only a smooth, even expanse. Then, compaction becomes paramount; using a plate compactor or roller to press the soil into submission, removing air pockets and consolidating the earth beneath. This process ensures the concrete slab how to remains unwavering, whether faced with seasonal shifts or the relentless march of time. A carefully compacted, level foundation is the secret to a concrete slab that endures, standing as a testament to the craftsmanship behind every pour.
Building Forms and Edging – how to construct formwork to contain the concrete
Constructing a sturdy concrete slab begins with building precise formwork. Properly constructed forms shape the edges of your slab and keep the concrete contained during pouring. They also define the final dimensions, ensuring the slab fits perfectly within your project space. Using quality materials such as timber or metal, set the forms firmly into the ground, making sure they are level and square. This step is crucial for a professional finish and structural integrity.
Edging the forms with a reinforcing strip or additional stakes helps maintain form stability, especially as the concrete begins to set. A well-constructed formwork not only prevents leaks but also ensures clean, sharp edges. When building forms, pay close attention to alignment and height. The forms should match the intended thickness of the slab, and any deviations can compromise the entire project.
For those wondering concrete slab how to achieve a flawless finish, precise form building is the first step. It’s the backbone of a successful pour, providing the containment and shape necessary for a durable, long-lasting slab. Proper edging, combined with secure formwork, makes all the difference in creating a professional-grade surface that stands the test of time.
Setting the Base and Reinforcement
Adding Gravel or Crushed Stone – How to lay and compact a stable sub-base
Creating a stable foundation begins with properly setting the base for your concrete slab how to project. A well-compacted sub-base is essential for preventing future cracks and ensuring longevity. Start by adding gravel or crushed stone, which acts as a drainage layer and stabilises the soil beneath. This material distributes the weight evenly and resists shifting over time.
Once the gravel or crushed stone is spread across the excavated area, it must be carefully compacted. Use a tamper or a plate compactor to achieve a dense, solid layer. This step is critical—any loose or uneven spots can compromise the entire structure. For added stability, consider installing reinforcement, such as wire mesh or rebar, which further prevents cracking and supports the concrete as it cures.
Installing Reinforcement Mesh or Rebar – Proper placement and tying techniques
Setting the base for your concrete slab is a crucial step that often gets overlooked, yet it can make or break the entire project. Proper placement and secure tying of reinforcement mesh or rebar ensure the concrete remains crack-free and durable over time. When installing reinforcement, it’s essential to position the mesh or rebar correctly within the slab’s cross-section. This prevents the reinforcement from floating or shifting during pouring, which can compromise structural integrity.
Secure tying techniques involve using steel wire or specialised ties to fasten the reinforcement at regular intervals. This keeps everything in place and maintains the right cover distance — typically around 50mm from the formwork to the reinforcement. For larger slabs, consider creating a grid pattern, ensuring each section is firmly tied together. This step is where the details matter — a well-reinforced concrete slab how to guide can save you from costly repairs later on.
- Position the reinforcement about one-third from the bottom of the slab to optimise strength;
- Use spacers or chairs to maintain consistent cover and prevent reinforcement from settling during concrete pour;
- Double-check the placement before pouring, ensuring no reinforcement is misplaced or sagging.
By paying close attention to reinforcement placement and tying techniques, you lay the foundation for a resilient, long-lasting concrete slab — a vital part of any successful construction project. This meticulous approach underscores the importance of understanding concrete slab how to principles, ensuring your project withstands the test of time and elements.
Applying a Vapor Barrier – Using plastic sheeting to prevent moisture migration
Before pouring the concrete, it’s essential to apply a vapor barrier—an often overlooked step that can significantly influence the durability of your slab. Using high-quality plastic sheeting, you create a moisture-resistant shield that prevents water vapour from migrating upward into the concrete. This barrier protects against future cracking and reduces the risk of moisture-related issues, which can compromise structural integrity over time.
Proper placement of the vapor barrier is crucial. It should lie directly on the prepared sub-base, smooth and without wrinkles, ensuring a continuous seal across the entire area. Overlap seams by at least 150mm and secure them with tape to prevent shifting during the pour. This meticulous process forms the foundation not only for the concrete but also for the longevity of your entire project.
In the process of understanding concrete slab how to, integrating a vapor barrier seamlessly into your workflow guarantees that moisture won’t become a silent adversary. It’s a simple step that, when executed with precision, bolsters the resilience of your slab against the relentless forces of nature and time.
Pouring the Concrete
Mixing and Procurement of Concrete – Options for pre-mixed vs. on-site mixing
When it comes to pouring a concrete slab, choosing the right method for mixing and procurement can significantly influence the project’s success. In essence, you have two primary options: pre-mixed concrete delivered directly from the supplier or on-site mixing. Each approach comes with its own set of advantages and challenges, making it crucial to understand how to choose the best solution for your specific needs.
Pre-mixed concrete is convenient for smaller projects or when speed is essential. It guarantees a consistent mix and reduces labour, as the concrete arrives ready to pour. Conversely, on-site mixing offers flexibility, allowing you to tailor the mix to your exact specifications and control the quality more closely. This method can be cost-effective for larger slabs or when a custom blend is necessary.
For optimal results in your concrete slab how to, consider the volume of concrete needed, the project timeline, and available manpower. Some professionals prefer ordered deliveries of pre-mixed concrete for straightforward, quick pours, while others opt for on-site mixing to manage complex or large-scale projects more precisely. Whichever method you choose, ensuring proper procurement and mixing is key to achieving a durable and level slab that will stand the test of time.
Pouring Techniques – Best practices for pouring concrete for a smooth finish
Pouring a concrete slab is both an art and a science, demanding precision and patience. Achieving a smooth, flawless finish hinges on employing the right pouring techniques. As you begin, ensure the concrete is poured steadily, starting from one corner and working across the space to avoid cold joints and uneven surfaces. Using a chute or wheelbarrow can help control the flow, preventing segregation of the mix. Once poured, it’s vital to spread the concrete evenly, working swiftly but carefully to prevent air pockets and voids.
For a truly professional finish, consider using a screed — a long, straight board or specialised tool — to level the surface. Lightly dragging the screed across the top of the wet concrete helps remove excess and fills low spots, creating a uniform surface. After screeding, employ a bull float to smooth out imperfections and bring fine cement to the surface, enhancing the slab’s durability and visual appeal. Remember, patience is key: proper technique during the pouring process can make all the difference in how your concrete slab how to turns out—smooth, level, and built to last.
Spreading and Screeding – leveling the surface immediately after pouring
Once the concrete has been poured with meticulous care, the next critical phase in the concrete slab how-to journey is spreading and screeding. Immediate levelling of the surface is essential to ensure a flawless finish that not only looks professional but also guarantees structural integrity. As you begin spreading the wet concrete, work swiftly yet precisely to distribute the material evenly across the formwork. This prevents the formation of air pockets and voids that could compromise durability.
To achieve a truly level surface, employing a screed — whether a straight board or a specialised tool — is indispensable. Dragging the screed smoothly across the freshly poured concrete removes excess material and fills in any low spots, creating a consistent, flat plane. This step is the foundation of the entire success story of your concrete slab how to. After screeding, a bull float can be used to further smooth the surface, bringing fine cement particles to the top for enhanced durability and visual appeal. The harmony of these techniques, executed with patience and precision, transforms a simple pour into a work of sturdy elegance.
Finishing the Surface
Leveling and Smoothing – Using floats and trowels for a flat surface
Achieving a perfectly finished concrete slab is the final step that transforms a rough pour into a smooth, durable surface. Once the concrete has been screeded to level the area, the next phase involves surface finishing with floats and trowels. These tools are essential for leveling and smoothing, ensuring the surface is flat and free of imperfections.
Using a float, begin by working across the surface to close the pores and bring the cream to the top. This step helps in consolidating the slab and reducing surface roughness. Once the initial float passes are complete, switch to a trowel for a finer finish. The trowel allows precise control, leaving the surface polished and ready for curing.
For a high-quality finish, pay attention to timing. Start floating when the concrete firms up but remains workable. Overworking the surface can create a weak finish, so patience is key. The right combination of floats and trowels is what makes a concrete slab how to process successful.
Creating Texture or Non-slip Surface – Techniques for finishing the surface for aesthetics and safety
Achieving the perfect concrete slab isn’t just about durability; it’s about creating a surface that blends functionality with visual appeal. The finishing stage offers an opportunity to add texture or non-slip qualities that make your concrete both safer and more attractive. When considering how to finish a concrete slab, the choice of technique can dramatically influence its long-term performance and aesthetic charm.
One popular approach is to create a textured surface that enhances grip while adding visual interest. This can be achieved through methods such as broom finishing, where a stiff-bristled broom is dragged across the surface to produce fine lines. Alternatively, stamped patterns or decorative aggregates can be embedded during the finishing process to give your slab a unique character. For those prioritising safety, especially in outdoor settings, applying a non-slip surface is essential. Adding a slip-resistant additive to the topcoat or employing specialised finishers can dramatically improve traction, reducing the risk of accidents in wet conditions.
In the quest for a durable, aesthetically pleasing concrete slab, it’s vital to consider how to incorporate these finishing techniques seamlessly into your project. Whether you opt for subtle textures or bold patterns, the right finishing method elevates your concrete from mere groundwork to a lasting statement of craftsmanship and care.
Edge Finishing – Tools and methods for clean edges and joints
When it comes to finishing a concrete slab, nailing the edges is as crucial as pouring the stuff in the first place. A clean, well-defined edge not only elevates the aesthetic appeal but also prevents chipping and cracks down the line. Think of it as giving your concrete the perfect haircut — sharp, neat, and ready to impress. Proper edge finishing tools and techniques are the secret to achieving those crisp lines every time.
For a smooth and professional look, a common approach involves using a trowel or edging tool to shape the perimeter of your concrete slab how to. These tools are designed to create a clean, rounded or chamfered edge, enhancing both durability and visual charm. When working on joints, applying a jointing tool helps control cracking by directing where the concrete can flex, saving you from unsightly spider cracks later. For a more polished finish, a bull float or edging trowel can be employed to refine the surface and edges simultaneously.
In some cases, you might opt for a combination of methods, such as creating control joints with a groover and then sealing or sealing the edges with specialised sealants. These techniques not only improve longevity but also ensure that your concrete slab how to remains aesthetically pleasing over time. By mastering these finishing techniques, you turn an ordinary slab into a showcase of craftsmanship, ready to withstand the test of time and foot traffic.
Curing and Maintaining the Concrete Slab
Proper Curing Techniques – Methods to maintain moisture and prevent cracks
Once your concrete slab has been poured and finished, the journey towards durability truly begins. Proper curing is the silent guardian that transforms a simple mix into a resilient foundation. It’s a delicate dance of moisture and time, where neglect can lead to cracks and compromised strength. To master the art of concrete slab how to, maintaining consistent moisture levels during the initial curing period is paramount. This can be achieved by keeping the surface damp through techniques such as covering with wet burlap, plastic sheeting, or applying curing compounds that lock in moisture. Remember, patience is your ally—curing should last at least seven days in ideal conditions, extending longer in cooler weather.
Beyond curing, ongoing maintenance ensures your slab remains crack-free and robust. Regularly inspecting the surface for signs of drying or cracking allows early intervention. If cracks do appear, small hairline fractures can be sealed with specialised concrete repair products, preventing water ingress and further deterioration. To prevent future problems, avoid rapid drying caused by wind or direct sunlight—these can cause surface shrinkage cracks. Implementing a consistent maintenance routine not only preserves the integrity of your concrete slab but also prolongs its lifespan, making your investment stand the test of time. Understanding how to properly cure and maintain your concrete slab is essential in mastering the art of concrete slab how to, ensuring a flawless, enduring foundation.
Timing for Removing Forms – When and how to remove formwork safely
The moment of truth arrives when the formwork can finally be removed, revealing the silent testament to your craftsmanship. But beware—timing is everything in the delicate ballet of concrete slab how to. Rushing to strip away the forms too early can spell disaster, unleashing cracks and compromising the integrity of your foundation. Conversely, leaving them in place too long might cause unnecessary delays and hinder the final finish.
Generally, the rule of thumb in concrete slab how to is to wait at least 24 to 48 hours before carefully removing the forms in ideal conditions. Cooler weather extends this window, often requiring patience of up to 72 hours or more. It’s essential to assess the surface—if it feels firm and the concrete resists small taps, it’s likely ready. When removing the formwork, do so gently, pulling away from the slab edges to avoid disturbing the surface. A well-timed removal not only preserves the slab’s surface but also ensures a pristine, durable foundation that stands the test of time.
FAQs on Maintenance and Longevity – Tips for extending the lifespan of your concrete slab
Proper curing and maintenance are the unsung heroes of a durable concrete slab. Did you know that neglecting this crucial phase can reduce your slab’s lifespan by up to 50%? It’s not just about pouring and removing forms; it’s about preserving that freshly laid surface to endure the relentless march of time and traffic. Curing is the secret sauce that keeps concrete from cracking or drying out prematurely, ensuring it reaches maximum strength.
In the realm of concrete slab how to, maintaining optimal moisture levels during the first week is paramount. Covering the slab with plastic sheeting or applying curing compounds helps lock in moisture and prevent rapid evaporation. Regularly misting the surface—especially in hot, dry weather—can work wonders. Remember, patience is key—rushing the curing process invites cracks and weak spots.
To extend the lifespan of your concrete slab, consider implementing simple maintenance routines like sealing the surface every few years. Sealing protects against stains, weathering, and freeze-thaw cycles, which can wreak havoc on your hard-won foundation. An ordered approach, such as periodically inspecting for cracks and addressing them early, can save significant repair costs down the line.
Here’s a quick overview of essential tips for concrete slab how to maintain longevity:
- Regularly inspect for cracks or signs of wear
- Seal the surface every 2–3 years to prevent moisture ingress
- Keep heavy machinery and sharp objects away from the slab surface
- Ensure proper drainage around the slab to avoid water pooling
With these practices, your concrete slab will not only stand the test of time but also maintain its pristine appearance and structural integrity for decades to come. Remember, good maintenance isn’t just about preservation; it’s about giving your foundation the respect it deserves—after all, it’s the silent backbone of every successful project!


0 Comments